Child flows are new to Power Automate, and although the concept is simple, getting started is a little tricky. I'll walk you through setting up parent/child flows within a solution and how to move data between the two.
 Use a Solution
The first roadblock you might run into is that Child flows must be used inside Solutions. What is a solution, you say? Well first, you'll find them on the left rail in Power Automate. Second, solutions are a great way to package up one or more flows for deploying to a production environment. This means that you don't have to export and import individual flows one at a time; instead, you export and import one solution package. (Want more? Here's the Microsoft Walkthrough!)
To create a solution, click Solutions and then click + New solution. Fill out the new solution form in the right rail and click Create.
The flows
Your instinct might be to create the parent flow first, and that's fine if you have some logic you know you need to implement there first. However, you cannot add the Run Child Flow action and save your flow without an existing child flow to point to. For our purposes here let's create the child flow first. Click the + New drop down in the top toolbar and select Flow.
The trigger for the child flow can be a manual button, but I prefer to use HTTP actions for my trigger and for my response. I find this to be more flexible, and frankly, this is my comfort zone!
Let's also add the Get items SharePoint action so that we have some data to send back to the parent flow. I'm going to limit the count to the first item for the sake of simplicity.
Now let's add the HTTP Response action as the last part of our child flow. Here, set the Status Code to 200 to indicate a successful response. In the Body of the response, add the Body from the previous Get items action. This will serve the SharePoint items back to the parent flow, making them available for us to use. Here's our simple child flow in its entirety:
Make sure you rename your flow and save it. Now let's work on the parent flow!
Navigate back to the solution you created. You may notice that multiple tabs open as you work on flows within a solution. It's alright to close the extra tabs, but just know that your solution view will be updated with your changes after you save them and click the "done" button in the dialog that pops up.
Add a new flow from the top toolbar as before. I'm using a recurrence trigger here, but you can also use a manual trigger. Add the Run a Child Flow action next, and choose your child flow from the drop-down. You'll notice that the only choices available are flows within the current solution.
We aren't finished, but this is a good spot to save the parent flow and do a test run. What we want is the body of the response coming from the child flow because we are going to use that in a Parse JSON action next. After your successful test run, go to the child flow inside your solution and click into the most recent run instance. From there, copy the Body from the Response action.
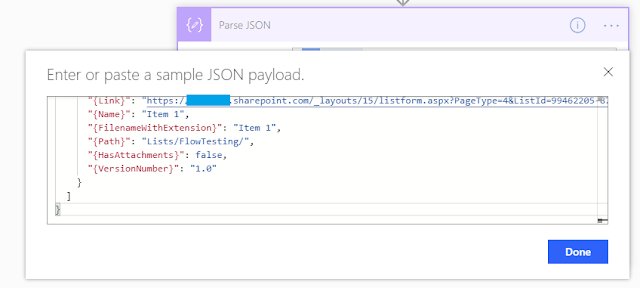
Navigate back to your parent flow. Add the Parse JSON action, with the Content being the Body from the Run a Child Flow action. Click on use a sample payload to generate schema and paste in the response body from the child flow:
Next, let's send an email with some of the information from the child flow. Add the Office 365 Outlook Send an email action. For the subject, search within the Dynamic content window for Title. Add the Title column from the previous Parse JSON action. Notice that Power Automate will add an Apply to each container for you since it does not know how many items have been returned from the response body, only what columns and data types are being returned.
Save your flow and run a test. You should receive an email--or emails!-- based on the Get Items action buried in the child flow. There are a lot of possibilities here, and I'm looking forward to seeing what interesting solutions are out there!
Photo by Sergey Pesterev on Unsplash
Photo by Sergey Pesterev on Unsplash


